

Welcome! Let’s talk about your secret weapon on the court. Think of your body like a high-performance sports car. Your range of motion is the premium fuel and regular maintenance it needs.
This isn’t just about basic stretching. Dedicated mobility exercises for tennis players let you move with purpose. They directly translate to a more powerful serve and quicker side-to-side steps.
Better movement also builds resilience. It’s your best defense against those common, nagging injuries that can sideline your game.
Our goal is to make this knowledge simple and actionable for you. Whether you’re just starting out or looking to refine your skills, we’re here to guide you.
Benefits and injury hotspots
Let’s explore the real benefits and the body areas you’ll protect with smart movement prep. It’s not just about feeling loose. It’s about improving your performance and extending your court time.
Right away, you’ll see a boost in racket head speed. Your joints will move better, giving you more power in your shots. You’ll also recover faster between points and matches, thanks to stronger muscles and connective tissues.
Think of a consistent mobility routine as your injury insurance. It gets your body ready for tennis’s explosive demands before you play. This is why a dynamic warm-up is essential for serious players.
Now, let’s look at common trouble spots—the “injury hotspots” every tennis player should know. These areas face the most stress during play. Ignoring them can lead to pain.
- The Shoulder: The rotator cuff and scapular muscles are under constant strain during serves and overheads. This is why dedicated shoulder prehab is critical.
- The Hips: Limited hip rotation steals power from your strokes and forces your lower back to compensate, leading to stiffness and injury.
- The Lower Back: It often becomes the victim when the hips and thoracic spine (mid-back) aren’t moving well.
- The Elbow: “Tennis elbow” often stems from issues upstream in the shoulder and wrist, not just the elbow itself.
Understanding these hotspots helps you focus your mobility work. By addressing them, you’re not just fixing problems—you’re preventing them. This is the core of intelligent training, like our guide to tennis-inspired fitness routines.
The “why” is clear. A smart mobility plan boosts performance and acts as your best defense. It turns a simple dynamic warm-up into the most important part of your training. Ready to learn how to check your own movement? Let’s move on to the assessment.
Movement Screen (Apley, Hip IR/ER, T‑Spine Test)
Before you start a road trip, you check the map. This movement screen is like your personal map. It’s a simple way to check how your body moves before we suggest any exercises.
It’s like solving a mystery. We’ll test three key areas that are crucial for powerful, pain-free tennis. You don’t need any special equipment—just a bit of floor space.
The Apley Scratch Test is first. Reach one hand behind your head and down your back, and the other hand up your back from below. Try to get your fingers to touch or overlap. It’s not just for scratching an itch! It shows how well your shoulders and upper back move, affecting your thoracic rotation.
Then, we’ll check your hip rotation. Lie on your back, bend one knee to 90 degrees, and let it fall inward and outward. Your hip should move smoothly in both directions. Can you rotate inward and outward easily, or does one side feel stiff? This is key for your stance and lunges.
Lastly, the Thoracic Spine Test. Sit tall in a chair, cross your arms, and rotate your upper body as far as you can to each side. Your lower body should stay put. This test measures your thoracic rotation—how well you can twist your torso for serves and groundstrokes.
What are you looking for? Symmetry and smoothness. If there’s a big difference between sides or if you feel pinching, it’s a clue. This screen isn’t a test to pass or fail. It’s your personal baseline map, showing you where to start improving your hip rotation and thoracic rotation.
8‑minute pre‑match warm‑up routine
You have eight minutes until match time—let’s make every second count. This isn’t the moment for long, static holds. It’s your window to fire up your engine with a purposeful dynamic warm-up.
Think of this routine as flipping the “on” switch for your body. It prepares your muscles and joints for explosive action. It also wakes up your nervous system and primes your movement patterns. This is how you build true, game-ready tennis mobility from the very first serve.
Follow this sequence in order. It’s designed to build intensity safely and effectively. Grab your racket, find a little space, and let’s begin.
- Minutes 0–2: Cardio Pulse (Light Jog & Skips)
Start by gently elevating your heart rate. Jog lightly in place or around the court perimeter for 60 seconds. Then, switch to 30 seconds of easy skipping, focusing on a soft landing. This gets blood flowing to all your major muscle groups. - Minutes 2–4: Lower Body Wake-Up (Leg Swings & Lunges)
Hold onto the fence for balance. Perform 10 forward/backward leg swings with each leg, then 10 side-to-side swings. This loosens your hips and hamstrings. Follow with 5 walking lunges per side, adding a gentle torso twist over your front leg to engage your core. - Minutes 4–6: Upper Body & Core Activation (Arm Circles & Twists)
Stand tall and make large, controlled arm circles forward for 10 reps, then backward. This warms your shoulders and scapular muscles. Next, do 10 standing torso twists, letting your arms swing naturally to mobilize your spine. - Minutes 6–8: Sport-Specific Priming (Lateral Shuffles & Shadow Swings)
Finish by mimicking match movements. Perform 3 sets of quick lateral shuffles over a 10-foot distance, staying on the balls of your feet. Lastly, take your racket and perform 5 slow, controlled shadow swings for your forehand, backhand, and serve. Focus on smooth, full rotation.
That’s it! In just eight minutes, you’ve elevated your core temperature, enhanced joint lubrication, and activated the exact muscle chains needed for tennis. Making this a non-negotiable pre-match ritual is one of the smartest investments in your performance and injury prevention. For more ideas to expand your preparation, check out our guide on top tennis warm-up exercises. Now step onto the court feeling agile, alert, and absolutely ready to play.
Shoulder Care (Scapular Control, Cuff Band Series)
To build a strong shoulder for tennis, focus on control and strength. Your shoulder is key for your stroke. It needs a stable base and strong parts.
Smart shoulder prehab keeps you swinging well. It’s the work before the game that matters.
First, work on scapular control. Your shoulder blade is the base for your arm. If it’s unstable, your serve will wobble.
Drills like scapular retractions and wall slides help. They teach your blade to move smoothly.
Next, build strength. The rotator cuff muscles stabilize your shoulder. They’re key for overhead stability.
Use a light resistance band for the Cuff Band Series. Focus on control and endurance, not heavy weights. Do 2 sets of 15-20 slow reps for each exercise.
- External Rotation: Anchor the band at waist height. With your elbow tucked and bent to 90 degrees, rotate your forearm outward. This targets a key muscle for backhand stability.
- Internal Rotation: Face the anchor point. With the same elbow position, pull your hand inward across your body. This balances strength around the joint, important for band exercises for shoulder health.
- Scaption Raises: Hold the band in both hands in front of your thighs. Raise your arms at a 45-degree angle until they reach shoulder height. This strengthens your shoulders in a safe way.
- Face Pulls: Anchor the band at face level. Pull the band towards your forehead, squeezing your shoulder blades. This improves posture and scapular control.
Do this series 2-3 times a week. You’ll get strong shoulders for fearless overheads and a powerful serve. This care is for anyone, not just athletes. It’s like preventative joint care for desk workers. A few minutes a day keeps your joints healthy for life.
Hip Rotation Drills (90/90, Adductor Rocks)
Powerful groundstrokes start with your hip rotation. Think of your hips as the powerhouse for every explosive move. When they rotate freely, you get a deeper lunge and a solid base for your forehand. This lets you generate force from the ground up.
We’re introducing two game-changing drills: the 90/90 and adductor rocks. They might look simple, but they deeply impact your hip mobility and game.
The 90/90 Hip Rotation Drill
This drill isolates and improves both your internal and external hip rotation. Here’s how it works:
- Sit on the floor with one leg bent in front of you at a 90-degree angle, knee pointing forward.
- Your other leg is also bent at 90 degrees, but the knee points out to the side.
- Gently rock your torso forward and back, feeling a stretch in the front hip of the rear leg.
This movement helps your tennis stance. Better internal rotation gives you a wider, more stable base. Improved external rotation lets you reach for low volleys or wide balls.
The 90/90 is more static, but adductor rocks add a dynamic element. This drill targets the inner thigh muscles (adductors), key for lateral movement and stability.
- Start in a deep squat position, often called a “frog stance.”
- Place your elbows inside your knees for a gentle press.
- Rock your weight slowly from side to side, feeling the stretch in your inner thighs and hips.
This rocking motion improves flexibility and control for quick side-to-side shuffles. It teaches your hips to move smoothly under load, like during a sprint to a wide ball.
To see how these drills complement each other, here’s a quick breakdown:
| Drill | Primary Focus | Key Tennis Benefit | Feeling You’ll Notice |
|---|---|---|---|
| 90/90 Rotation | Isolating internal & external hip rotation | Deeper, more stable lunges; improved stance width | Increased range in your hip socket |
| Adductor Rocks | Dynamic adductor & hip mobility | Better lateral agility and force transfer from the ground | Easier, more powerful side shuffles |
| Combined Effect | Total hip function and control | Explosive court coverage and powerful groundstrokes | More connected, fluid movement overall |
Include these drills in your daily routine or pre-match warm-up. Start with 30 seconds per side for the 90/90 and 60 seconds of adductor rocks. You’ll quickly notice a difference in your movement and hitting. Your hip rotation is key to unlocking your full court performance—let’s start turning it!
T‑spine flow (open books, reach‑roll‑lift)
Ever feel like you’re trying to swing a racket while wearing a tight jacket? That’s often your thoracic spine asking for more mobility. This mid-back area is key for the power in your serves and groundstrokes.
When your thoracic rotation is limited, your shoulders and lower back have to overcompensate. This leads to inefficient movement and a higher risk of strain. We’re going to fix that with a smooth, flowing sequence.

Introducing the T-spine flow. Think of it as gently unwinding a tight spring in your core. This practice creates more elasticity, allowing for a bigger wind-up and a more fluid follow-through on every shot.
Let’s get into the two key movements that make up this flow. You can do them right before practice or as part of your daily routine.
| Exercise | Primary Focus | Setup & Movement | Key Cue for Tennis |
|---|---|---|---|
| Open Books | Isolated spinal rotation | Lie on your side, knees bent. Keep hips stacked as you open your top arm to the ceiling, following with your gaze. | “Open up like a book.” Feel the stretch through your mid-back, not your shoulder. |
| Reach‑Roll‑Lift | Integrated rotation with core control | Start on hands and knees. Reach one arm under your body, then roll up to lift that arm toward the ceiling. Keep your hips stable. | “Reach under, then lift to the sky.” This mimics the loading and unloading of your torso during a stroke. |
Start with 8-10 slow, controlled reps on each side for the Open Books. Focus on quality of movement, not speed. You should feel a gentle stretch, not pain.
Then, move into the Reach-Roll-Lift for another 5-8 reps per side. This drill is more dynamic and connects your thoracic rotation to your core and hips.
Putting them together creates the “flow.” The Open Books wake up the stiff joints, and the Reach-Roll-Lift teaches your body to use that new mobility. You’ll notice a difference in your ability to rotate freely on the court.
Improved spinal elasticity means more power comes from your core, not just your arm. Your strokes will feel smoother, and you’ll protect your shoulders and lower back from unnecessary stress.
Foot/ankle agility and stiffness fixes
Your feet and ankles are like the base of a house. If they’re weak or stiff, the whole thing suffers. On the tennis court, they’re your direct contact point. They need to be agile for quick changes and stiff for powerful moves.
Agility and stiffness might seem like opposites. But for tennis players, you need both. Agility lets you react and change direction. Stiffness gives you the spring to sprint or jump.
First, let’s loosen things up. If your ankles are tight, you won’t move well. Simple band exercises are perfect for this. They gently pull your joint into ranges it doesn’t normally go, improving mobility without strain.
Try the Banded Ankle Distraction. Sit with your leg straight. Loop a resistance band around the ball of your foot. Gently pull the band to create tension, then slowly draw circles with your big toe. Move your ankle in all directions for 30 seconds per foot. You’ll feel a great release in the joint!
Another excellent mobility drill is the Banded Ankle CAR (Controlled Articular Rotation). This is more advanced. With the band around your foot, slowly and deliberately move your ankle through its full circle of motion. Focus on control, not speed. This drill “greases” the joint for smoother movement.
Now, let’s build that springy stiffness. This is where a dynamic warm-up comes into play. These are active, bouncy drills that teach your feet and ankles to be both strong and responsive.
Pogo Jumps are a classic. Stand on one leg, with a slight bend in your knee. Quickly bounce up and down on the ball of your foot, like a pogo stick. Keep the motion small and fast. Aim for 20-30 quick bounces per leg. This builds the elastic stiffness needed for quick first steps.
Lateral Hops train side-to-side power. Stand on one leg next to a line. Hop sideways over the line and back, landing softly and immediately hopping again. Do 10-12 hops per side. This mimics the rapid shuffling you do during a rally.
Incorporating these drills gives you that confident, springy feel underfoot. You’ll stop slipping during lateral cuts. Your push-off on serves will feel more powerful. It’s the difference between feeling sluggish and feeling explosive during a long point.
To make it easy, here’s a quick-reference table comparing the two types of drills we covered. Mix and match them based on what your body needs that day.
| Drill Type | Primary Goal | Example Exercise | Key Benefit for Tennis |
|---|---|---|---|
| Mobility (Band Exercises) | Increase joint range of motion | Banded Ankle Distraction | Improves ability to absorb force on uneven surfaces |
| Stiffness (Dynamic Warm-up) | Build reactive, spring-like strength | Single-Leg Pogo Jumps | Enhances push-off power for sprints and jumps |
| Mobility (Band Exercises) | Improve movement control | Banded Ankle CARs | Reduces risk of rolls and sprains during cutting |
| Stiffness (Dynamic Warm-up) | Develop quick force production | Lateral Line Hops | Boosts side-to-side agility for court coverage |
Start your practice with 2-3 mobility drills. Then, add 2-3 stiffness drills to your pre-match dynamic warm-up. In just a few weeks, you’ll notice a huge difference. Your feet will feel more connected to the court, ready for anything your opponent throws at you!
Pairing mobility with strength lifts
Mobility exercises are like a powerful engine without a strong body. They need strength to work well. Think of playing tennis. You need to move well and have the power to move fast.
Players who are flexible but get hurt when they move too much are common. Others are strong but can’t move well. The key is to combine both. Your drills for moving your hips make your squats better and safer. Your shoulder work makes your overhead press strong and stable.
The main rule is: mobility first, strength second. Before lifting heavy, use band exercises to get your muscles ready. This helps your glutes work during a deadlift and your shoulders stay stable during a press. It’s like saying, “It’s time to play!”
Here’s a plan to pair mobility drills with strength lifts.
| Mobility Drill | Paired Strength Lift | Activation Band Exercise | Key Benefit |
|---|---|---|---|
| Hip 90/90 Drill | Barbell Back Squat | Banded Glute Bridge | Creates stable, deep squat position |
| T-Spine Open Books | Overhead Press | Band Pull-Aparts | Ensures full, safe range for overhead stability |
| Adductor Rocks | Deadlift | Banded Lateral Walk | Improves hip hinge and power off the ground |
| Scapular Control Series | Bench Press | Face Pulls with Band | Protects shoulders and enhances pushing power |
See how it works? The mobility drill gets the joint ready. The band exercise turns on the muscles. Then, the strength lift builds power through that full range. This is how you build strength for the court.
Overhead stability is a great example. Having a flexible shoulder isn’t enough if your shoulder muscles are weak. Do band pull-aparts before pressing to engage your upper back. This gives your shoulder a strong base. This prevents injuries and builds power for your serve.
Start your strength sessions with this simple 5-minute routine:
- Pick your main lift for the day (e.g., Squat).
- Do the corresponding mobility drill for 60 seconds.
- Perform the paired activation band exercise for 10-15 reps.
- Begin your lifting sets. You’ll feel more connected and powerful!
We’re not just lifting weights. We’re training movement. By pairing mobility with strength, you build a body that’s both supple and strong. This is the foundation for explosive, injury-resistant tennis. Next, let’s take this new-found capability and apply it directly to your footwork.
On‑court footwork ladder routine
This is where the rubber meets the road: transforming your mobility work into explosive court coverage. All those hip rotations and thoracic stretches have a single, powerful purpose—to make you a faster, more agile player. Now, we apply that new-found freedom directly to tennis movement with a fun and challenging on-court routine.
Forget just running through a ladder. We’re training your body to move with control and precision in all planes of motion. You’ll practice going forwards, backwards, laterally, and diagonally. This mimics the unpredictable demands of a real point.
Think of this ladder session as the final piece of your dynamic warm-up. It integrates those general mobility principles into sport-specific patterns. The result? Your improved tennis mobility turns into tangible, faster reactions and court coverage. You will be amazed at how much quicker you feel.
Let’s break down the routine. You’ll need a speed ladder or just imagine the rungs on the court. Perform each drill for 30-45 seconds, focusing on quality over speed. Keep your posture tall and your movements crisp.
| Drill | Movement Pattern | Key Focus & Tennis Link |
|---|---|---|
| Two-Feet In/Out | Forward hops, both feet in each square. | Builds ankle stiffness for powerful push-offs. Essential for sprinting to a short ball. |
| Lateral Shuffle | Side-to-side steps, one foot in each square. | Trains defensive side-shuffling. Keep hips low and shoulders square to the net. |
| Ickey Shuffle | In-in-out lateral pattern. | Develops cross-over step agility for recovering to the center after a wide shot. |
| Ali Shuffle | Rapid toe-taps, alternating forward/back. | Enhances quickness and balance at the net. Prepares you for volley exchanges. |
| Diagonal In & Out | Step forward at a 45-degree angle through the ladder. | Mimics moving to intercept a ball. Connects hip rotation with forward lunging. |
Notice how each drill translates to a specific on-court action. The lateral shuffle isn’t just a footwork drill; it’s practice for holding your ground during a baseline rally. The diagonal steps directly improve your ability to cut off angles.
Start slow. Master the pattern first, then gradually increase your pace. The goal is not to trip, but to move with intention and stability. This routine bridges the gap between gym work and game speed.
Incorporate this ladder work 2-3 times per week, either after your general dynamic warm-up or as a standalone agility session. Pair it with the mobility drills from earlier sections for a complete system. Your feet will thank you during that next long deuce point!
Cool‑down & recovery plan
After you leave the court, your work is far from over. A smart cool-down plan is key to staying healthy and ready for the next game. Think of your body like a high-performance car. After a tough match, it needs to cool down before it can run well again.
This phase is about changing your body’s state from “go” to “rest and repair.” It’s not just about feeling less sore tomorrow. A regular routine builds strength, lowers injury risk, and keeps you playing your best tennis all season.
Begin your cool-down with 5-10 minutes of light activity. A slow walk or jog around the court is great. Then, do easy stretches for your major muscles. Hold each stretch for 30-45 seconds—no bouncing!
Focus on your quads, hamstrings, calves, and lower back. This isn’t the time for intense flexibility work. The goal is to tell your muscles the hard work is done and to encourage blood flow for repair.
Your shoulders need special care after all those serves and overheads. This is where shoulder prehab continues into your recovery. Do slow, controlled arm circles, both forward and backward. Then, try a gentle doorway stretch for your chest and front shoulders.
To support overhead stability, finish with a simple exercise. Hold a light band or towel with both hands overhead. Gently pull it apart, engaging your upper back muscles, and hold for 10 seconds. Repeat 5 times. This reminds those important stabilizers to stay engaged even at rest.
Recovery goes beyond the court. Here’s a simple plan to follow after every match or tough practice:
- Hydrate: Drink water or an electrolyte beverage within 30 minutes.
- Fuel: Eat a snack or meal with protein and carbs to help muscles rebuild.
- Mobilize: Later in the day, do 5 minutes of easy movement like walking or the gentle stretches mentioned.
- Rest: Prioritize sleep—this is when your body does its most important repair work.
By making this cool-down and recovery plan a habit, you’re investing in your long-term success on the court. You’re not just recovering from today’s match; you’re preparing your body, including your shoulders, for the next one. Consistency here pays off with fewer aches, better performance, and a body that’s ready when you are.
Desk/gaming wrist–elbow resets
Desk work and gaming can secretly harm your tennis game. Hours of typing and scrolling lead to stiffness. This stiffness affects your wrists, elbows, and shoulders.
Introducing “resets,” quick movements to do at your desk. They combat the hunched posture typing forces on you. Think of them as refreshing your upper body. A few minutes a day can make a big difference.
Light resistance bands are great for these resets. They offer gentle tension for band exercises that wake up muscles. This is proactive shoulder prehab for athletes. It keeps joints loose and muscles ready to train or play.
| Posture Problem | Area Affected | Quick Reset | Key Benefit |
|---|---|---|---|
| Hunched Shoulders (Typing) | Upper Back & Shoulders | Band Pull-Aparts | Opens chest, strengthens rear delts |
| Wrist Extension (Mouse Use) | Forearms & Wrists | Wrist Flexor Stretch | Relieves tension, improves flexibility |
| Elbow Flexion (Arm on Desk) | Elbows & Triceps | Overhead Tricep Extension with Band | Mobilizes elbow, counters stiffness |
Try this simple routine. Sit up straight in your chair. Hold a light resistance band with both hands, arms straight out. Pull the band apart, squeezing your shoulder blades together. Hold for two seconds, then slowly return. Do 10-15 reps.
Next, extend one arm straight out, palm up. Use your other hand to gently pull the fingers back toward you. Feel the stretch along your forearm. Hold for 20 seconds on each side.
Make these resets part of your daily routine. Set a timer to remind you every hour. Just 60 seconds of movement can reset your posture and prevent aches. This consistent care is the core of smart shoulder prehab. For more targeted relief, check out these exercises for tennis elbow at home.
Remember, your body doesn’t know the difference between work and play. Tension from the desk follows you onto the court. By using these simple band exercises as daily resets, you take control. You turn idle time into prep time, ensuring your arms and shoulders are always game-ready!
Weekly Schedule (In‑Season & Off‑Season)
A weekly schedule is key to keeping your hip rotation and thoracic rotation skills sharp all year. It’s about fitting your mobility work into your life, not adding stress. We’ll share two plans: one for when you’re competing and one for when you’re building your skills.
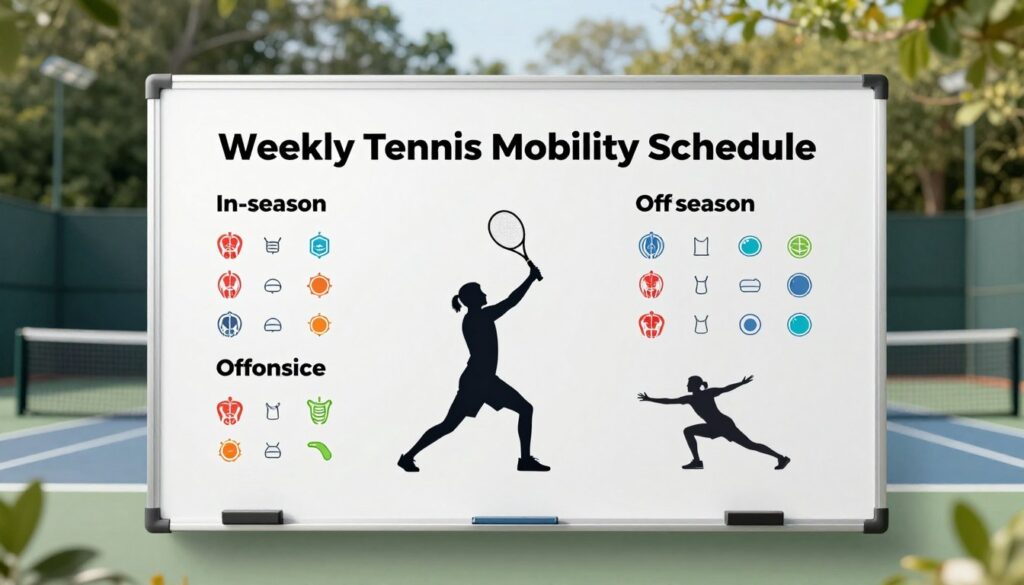
During the competition season, your focus is on maintenance and priming. You aim to stay flexible, avoid stiffness, and get ready for matches. It’s about protecting the tennis mobility you’ve worked hard for.
Here’s a sample in-season week for a player with weekend matches:
- Monday (Active Recovery): Do a light, full-body flow. Start with 10 minutes of easy T-spine open books and adductor rocks.
- Tuesday (Practice Day): Do a full 8-minute warm-up before hitting. Use shoulder bands after practice.
- Wednesday (Strength & Mobility): Mix your hip rotation drills with lower-body strength lifts.
- Thursday (Practice Day): Repeat Tuesday’s routine. Focus on scapular control during serves.
- Friday (Pre-Match Primer): Do a short, dynamic session. Include footwork ladder and ankle stiffness drills.
- Saturday/Sunday (Match Days): Do the full pre-match warm-up 30-45 minutes before playing.
The off-season is your growth phase. This is where you make big improvements. You have more time to work on your weaknesses and build a stronger base. Focus on hip rotation and thoracic rotation in dedicated sessions.
Here’s a sample off-season week:
- Monday (Hip Focus): Spend 20 minutes on deep 90/90 drills, adductor rocks, and hip internal rotation work.
- Tuesday (Strength Day): Mix T-spine flow exercises with upper-body lifting.
- Wednesday (Active Recovery): Do light movement and wrist-elbow resets from your desk.
- Thursday (Full Mobility Circuit): Spend 30 minutes on a session combining shoulder care, hip drills, and T-spine work.
- Friday (Strength & Integration): Pair ankle agility drills with lower-body lifts. Finish with a full cool-down.
- Weekend: Rest one day, enjoy non-tennis activities the other.
Make your tennis mobility work a key part of your routine. Fit your 10-30 minute sessions into your day, before or after court or gym time. This makes it a habit that feels natural.
With these schedules, you’re set for every season. Stay consistent and you’ll keep moving freely and hitting stronger, year after year.
Progress tracking & benchmarks
How do you know if all those drills and routines are actually making a difference on the court? The answer lies in tracking your progress. Without clear benchmarks, improvement can feel vague. Let’s make it concrete and motivating!
We’ll start by revisiting the movement screens from earlier. Remember the Apley scratch test, hip internal/external rotation checks, and the thoracic spine rotation test? These are your baseline measurements. Retest them every 4-6 weeks.
For hip rotation, improved numbers look like gaining 5-10 more degrees of smooth, pain-free motion. You shouldn’t feel that familiar pinch in the front of your hip. For thoracic rotation, success means turning further without your lower back or ribs hitching. Your shoulders should stay level as you rotate.
Beyond degrees on a test, we set simple, on-court performance benchmarks. These are the “feel” goals that prove your mobility is translating to your game.
- Holding a deep squat position comfortably for 30 seconds, chest up and heels down.
- Executing a serve wind-up or overhead smash with zero stiffness or grabbing in your upper back.
- Moving into a wide forehand or backhand stance without feeling restricted in your inner thighs or hips.
- Noticing your recovery between points is faster because you’re not fighting tightness.
Tracking these wins is incredibly powerful. It turns abstract effort into a scoreboard you control. Did your hip rotation test improve? Celebrate that win! Did you feel loose on your serve? That’s a major benchmark hit.
This proof is what turns dedication into lasting habit. You’re not just working hard; you’re working smart and seeing the results.
FAQs
You’ve got questions about mobility for tennis, and we’ve got clear, actionable answers right here. Let’s tackle the most common curiosities and concerns players have when starting these routines.
Think of mobility like brushing your teeth. You do it daily for maintenance, with a more thorough clean occasionally. For best results, integrate short mobility sessions (5-10 minutes) into your daily routine, specially on training days.
Your weekly plan should include the full 8-minute dynamic warm-up before every match and practice. The specific joint drills—like shoulder band work or hip rotations—are perfect for off-court days or as a quick reset on rest days. Consistency beats duration every time!
Can I replace my dynamic warm-up with static stretching?
This is a key question! The short answer is no. A dynamic warm-up and static stretching serve different purposes. Think of your muscles like rubber bands.
A cold rubber band stretched and held (static) can snap. But a rubber band that’s gently warmed and moved through its range (dynamic) becomes springy and resilient. Your pre-match routine needs that springy, ready-to-go state that only dynamic movement provides.
Save static stretching for your cool-down when your muscles are warm and pliable. That’s the time to work on long-term flexibility gains.
Is shoulder prehab really necessary if my shoulder doesn’t hurt?
Absolutely! This is the perfect time for shoulder prehab. We call it “pre-habilitation”—preventing problems before they start. The tennis serve and overhead motions place enormous stress on the shoulder joint, often without immediate pain.
By the time you feel discomfort, there’s usually already some wear or imbalance. Shoulder prehab exercises, like the scapular control and rotator cuff band series, build a robust support system. They’re like reinforcing the foundation of a house before a storm hits, not after the roof leaks.
Your pain-free shoulder today will thank you for the protective care tomorrow.
We hope these answers help you move forward with confidence. Remember, the goal is sustainable play for years to come. Keep those questions coming, and keep moving well!
Conclusion
You started by figuring out what your body needs on the court. You learned how to check your movement and focus on important areas. Now, you have a full plan for keeping your tennis mobility strong for life.
This plan connects your movement check to your pre-match routine. It combines specific tennis mobility exercises with your strength training. Your weekly plan makes these habits second nature.
Sticking to this routine is a smart move for your athletic future. Regular tennis mobility exercises help prevent injuries. They also make your shots stronger and your movements quicker.
Put your new system into action. Do a dynamic warm-up before every practice. Cool down afterwards to speed up your recovery.
You’re ready to move better and play longer. Embrace this journey and see your game improve. Step onto the court with a body ready for peak performance, thanks to your dedication to tennis mobility.