
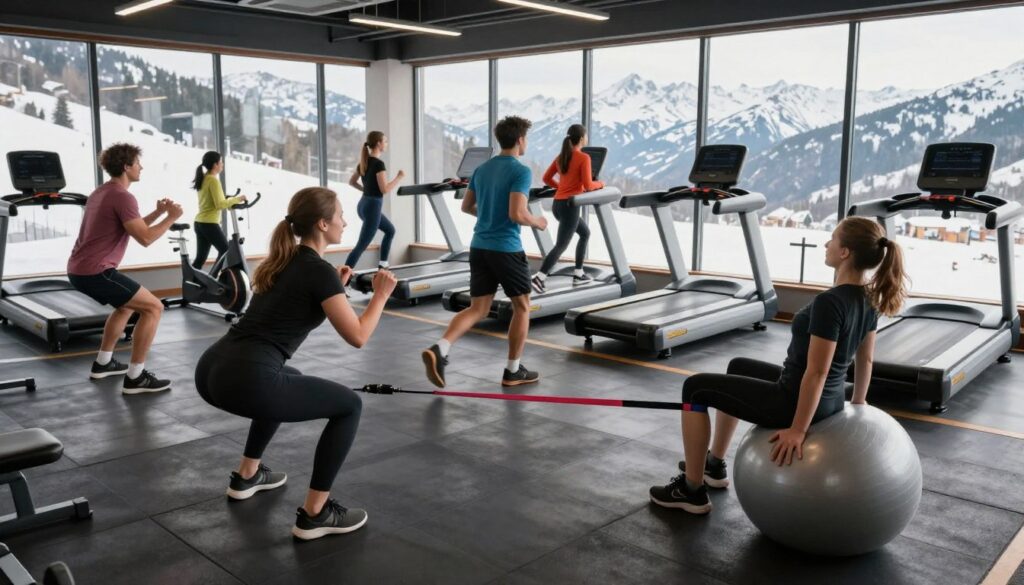
Welcome! We’re glad you’re thinking ahead for your season. That first chairlift ride is magical, but it can shock you if you’re not ready.
Think of pre-season training like sharpening your skis. It’s the prep work that lets you perform your best and ski safely.
If you wait for snow to get in shape, you’ll be late. By September, trainers like Connie Sciolino are already preparing. Start working on your fitness now to hit the ground running.
A good exercise program boosts your mountain performance and prevents injuries. Getting your body ready before hitting the slopes is smart. It helps you ski longer, feel stronger, and avoid early-season accidents.
In this guide, we’ll show you a complete plan. You’ll build the strength, stamina, and stability your legs and core need. For a proven start, see this structured pre-season ski workout.
Let’s get you ready for your first run!
Timeline & goals
Before you hit the slopes, create a detailed 8 to 12-week plan. It’s your roadmap to ski success.
Start your ski conditioning 8-12 weeks before your first ski day. In the U.S., that’s usually mid-September to early October.
This isn’t about rushing into workouts. A steady, smart plan lets your body adapt and get ready for the slopes.
Your first goal is to build a strong aerobic base. This endurance keeps your legs strong all day, from start to finish.
Do three 30-minute cardio sessions a week. Biking, hiking, brisk walking, or stair climbing are great options. Being consistent is key!
Good ski conditioning follows a structured plan, like training for a race. You start with a base, then increase intensity, and peak at the start of the season.
The table below shows your first month’s plan. It combines cardio with foundational strength work.
| Week | Primary Focus | Sample Activities | Weekly Goal |
|---|---|---|---|
| 1 & 2 | Aerobic Base & Introduction | 3x 30-min brisk walks, 2x full-body mobility sessions | Establish routine, focus on form |
| 3 & 4 | Base Building | 3x 35-40 min bike/hike, add 2x light strength sessions | Increase cardio duration gently |
| 5 & 6 | Strength Development | 2x 45-min cardio, 3x focused strength workouts | Build muscular endurance |
| 7 & 8 | Integration & Power | Mix intervals into cardio, add plyometrics to strength days | Translate strength to ski-specific power |
Following this timeline turns vague fitness dreams into real results. By the time snow arrives, you’ll be confident, strong, and ready to enjoy every run.
Movement Screen (Ankle/Knee/Hip)
A movement screen is like a pre-season check-up for your joints. It ensures they work smoothly together. This is key for injury prevention and balance training in skiing.
Your body is like a high-performance suspension system for skiing. Each joint acts as a shock absorber. If one is stiff, others have to work harder, leading to fatigue and strain.
Skiing needs great neuromuscular control and balance. A simple screen can show which part of your “suspension” needs improvement. This leads to better skiing, fewer aches, and better handling of uneven terrain.
Are you ready to be a detective? We’ll do three basic tests without any equipment.
Use the table below as your guide. Move slowly and smoothly. The goal is to notice any differences or restrictions.
| Joint | Simple Test | What to Look For | Common Issue to Note |
|---|---|---|---|
| Ankle | Knee-to-Wall Test: Stand facing a wall. Place one foot forward and try to touch your knee to the wall without your heel lifting. | Can your knee travel past your toes? Is there a big difference between left and right? | Limited dorsiflexion. This can force your knee inward during a turn. |
| Knee | Single-Leg Mini Squat: Balance on one leg. Slowly lower into a tiny squat, just a few inches. | Does your knee track straight over your middle toe? Or does it wobble inward (valgus)? | Knee valgus. This instability stresses ligaments and reduces power transfer. |
| Hip | 90/90 Sit Test: Sit on the floor. Bend both knees to 90 degrees in front and to the side, like a butterfly stretch. | Can you sit upright with a neutral spine? Or do you round your back significantly? | Poor internal hip rotation. This limits your ability to steer and pressure your skis. |
Found a limitation? That’s why we do the screen now. It helps you focus your training on the right areas.
This proactive approach builds a strong, balanced body. It’s not just about getting fit for skiing. It’s about preparing your body for the mountain’s forces.
Strength Base (Front Squat, Split Squat, RDL)
Think of your muscles as a savings account. The more strength you deposit now, the more you can withdraw later. This is where we build your body’s engine room! The power for controlled, dynamic turns comes straight from your glutes, quads, hamstrings, and core.
We’ll focus on three foundational moves. These exercises are the staples of any effective ski conditioning plan. They create the raw power and stability your body needs to perform.
First, the Front Squat. This exercise is a superstar for building quad endurance and core strength. By holding the weight in front, you force your torso to stay upright. This mimics the athletic stance you hold while skiing.
Next is the Split Squat. Skiing isn’t always two-legged; you often balance on one leg during a turn. This move builds single-leg stability and glute power. It directly translates to better control when you’re edging your skis.
Lastly, the Romanian Deadlift (RDL). Don’t neglect the back of your legs! Strong hamstrings and glutes are key for absorbing bumps and initiating turns. The RDL trains eccentric strength—your muscles’ ability to lengthen under load. This is exactly what happens when you sink into a turn.
Here’s a quick guide to how these exercises build your ski foundation:
- Front Squat: Primary focus on quads and core; builds the strength to maintain posture.
- Split Squat: Targets glutes and improves single-leg balance; essential for linked turns.
- RDL: Develops hamstring and glute strength; enhances control and shock absorption.
Consistently training these movements deposits strength into your “muscle bank.” When you’re on the mountain making hundreds of turns, you’ll be making withdrawals. A bigger strength base means you ski longer, harder, and with more confidence. Let’s get that account balance growing!
Eccentric/isometric quad work
The secret to conquering thigh burn lies in two often-overlooked training methods: eccentric strength and isometric holds. While general leg power is great, skiing punishes your quads in very specific ways. We need to train for those exact demands.
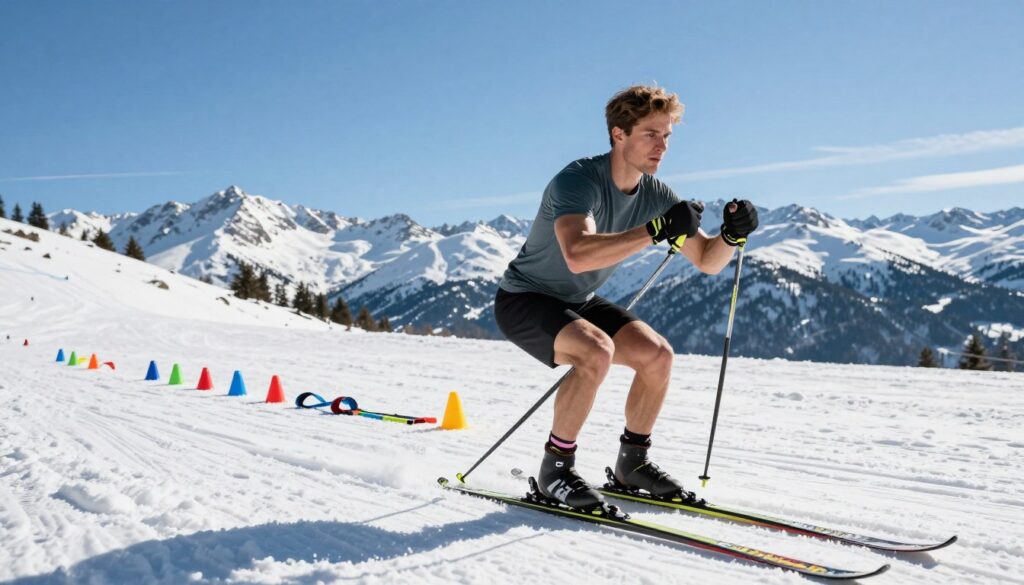
First, let’s talk about the eccentric phase. Imagine your muscle is a spring. When you hit a bump or absorb a turn, your quadriceps lengthen while under tremendous tension. This controlled lowering is an eccentric contraction. It’s what makes your legs feel shredded after a day of moguls!
Second is the isometric phase. This is a static hold. Think about a long, steep groomer where you’re locked in a turn for what feels like forever. Your quads aren’t moving much, but they’re firing constantly to maintain pressure on your edges. This requires serious quad endurance.
To bulletproof your legs, we’ll target both. Here are two foundational exercises:
- Eccentric Focus: Slow, controlled squats. Take 3-5 seconds to lower yourself down, then stand up normally. This builds the exact control you need for rough terrain.
- Isometric Focus: The classic Wall Sit. This is your best friend for building the stamina to laugh at long descents.
For your wall sits, start by aiming for a 2-minute hold. Your back is flat against a wall, knees at 90 degrees. It will feel challenging! The goal is to add time with each workout. Can you get to 3 minutes? Four? This directly builds the isometric quad endurance for those non-stop runs.
By combining these two types of work, you’re not just getting stronger. You’re preparing your muscles for the very nature of skiing itself. Your legs will thank you when you’re feeling fresh on the last chair of the day.
Power & Plyos (Hops, Bounds, Drop Jumps)
Ready to add a spring to your step? Plyometrics are the key to agile, responsive skiing. This training turns your solid strength base into explosive, on-snow power.
Think of plyometrics (or “plyos”) as exercises that teach your muscles to fire fast. They mimic the quick, reactive movements you make while skiing. We’re talking about hops, bounds, and controlled jumps.
These drills train your nervous system and muscles to work together. The goal is to generate force rapidly. This is exactly what you need for bouncing through moguls or making sharp turns.
Safety and progression are key. Always start with simple, low-impact movements. Master two-foot hops on a soft surface before advancing.
Here are foundational plyometric exercises for skiers:
- Box Jumps: Build vertical pop for absorbing terrain. Focus on a soft, quiet landing.
- Lateral Bounds: Train side-to-side power for carving and edge changes. Push off explosively from one foot.
- Lunge Jumps: Develop single-leg stability and power. Explode upward from a lunge position, switching legs in mid-air.
- Drop Jumps: Improve reactive strength. Step off a low box, land softly, and immediately jump vertically or forward.
Why does this work so well for skiing? When you hit a mogul field, your legs act like springs. Plyometrics condition those springs to be both strong and fast.
They upgrade your legs from a reliable sedan to a nimble, all-terrain vehicle! You’ll feel more confident initiating turns and recovering from unexpected bumps.
For broad jumps and other explosive moves, think about mimicking aggressive carving. The power you generate on flat ground translates directly to your edges on snow.
Keep your sessions short and intense. Perform plyometric drills on a forgiving surface like grass or a gym floor. Allow full recovery between sets—quality over quantity always wins.
Integrate this power work 1-2 times per week during your pre-season build phase. Pair it with your strength training for the best results. You’ll be amazed at the pop in your turns come opening day!
Balance & ankle stability drills
Think of skiing as a constant battle to regain balance. Every bump and turn tries to throw you off. That’s why balance training is key for the slopes.
This training is more than just standing on one leg. It targets your body’s awareness system, called proprioception. This system helps your ankles, knees, and hips know their position in space, allowing quick reactions.
We start with simple holds and move to dynamic drills. These exercises challenge your ankles and help your small stabilizing muscles work fast. This is what keeps you steady on your edges.
Here’s a quick guide to tools you can use, each with a unique challenge:
| Tool | Primary Focus | Progression Tip |
|---|---|---|
| BOSU Ball | Unstable surface training for hips & core | Start dome-side up, then flip it for a harder challenge. |
| Balance Board | Ankle reactivity & edge control simulation | First, just find center. Then, try gentle tilts forward and back. |
| Floor (No Equipment) | Foundational proprioception & strength | Close your eyes to increase the difficulty dramatically. |
Ready to build confidence? Start with this simple progression at home:
- Single-Leg Balance: Stand on one leg for 30 seconds. Keep a soft knee. Do this while brushing your teeth!
- Single-Leg Reach: From that balanced position, slowly reach the free foot forward, to the side, and behind you. This adds dynamic movement.
- BOSU Ball Taps: Stand next to a BOSU (dome side up). Balance on one leg and lightly tap the center of the BOSU with your other foot, returning to balance each time.
These drills will quickly improve your coordination and reaction speed. Strong, reactive ankles help you recover fast from surprises. Remember, balance is part of being athletic. Add sports drills for cardio to build endurance and stability for a full mountain day.
Conditioning (Intervals, Rucking, Stairs)
Skiing needs endurance and explosive power. Our conditioning plan focuses on this. It’s not like running a marathon. It’s about quick efforts and short breaks, like skiing.
This ski conditioning helps you power through the day. Let’s look at the three main parts of our plan.
Interval Training: Mimic the Mountain. Skiing requires quick energy and endurance. Interval training helps build your heart and lungs for skiing’s rhythm. It’s like skiing in the gym or on the track.
Work hard for a short time, then rest. This trains your body to recover fast. So, you’re ready for the next challenge.
Rucking: Build Endurance Under Load. Carrying your gear can be tiring. Rucking, hiking with a backpack, strengthens your legs and back. It’s about stamina under load.
This isn’t about speed. It’s about staying strong over time. Rucking on hills makes you efficient and resilient for long ski days.
Stair or Hill Sprints: For Brutal Power. For quick energy in heavy snow or steep slopes, you need power. Stair sprints boost your leg power and cardio in one intense workout.
They work the muscles for fast turns and quick changes. It’s the most ski-like workout without skis.
Here’s how to mix these methods:
- Intervals improve your ability to repeat efforts.
- Rucking builds the endurance for a long day.
- Stair Sprints boost your explosive power for tough terrain.
Together, they make a complete conditioning plan. You’ll have energy for more laps than others. That’s the power of ski conditioning.
Mobility & tissue care for hips/back
Let’s move from building strength to keeping flexible. This is key to staying injury-free all season. Think of mobility as the oil for your body’s machine. Strong muscles need supple joints to move smoothly.
Tight hips can pull on your lower back. This causes pain in the classic ski stance. A stiff thoracic spine—your upper and mid-back—makes it hard to keep your upper body quiet. You need that separation to face downhill during turns.
Our goal is simple: give you stretches and drills for happy hips and back. Add some simple tissue care. Think of this as the maintenance schedule for your most important piece of gear—your body.
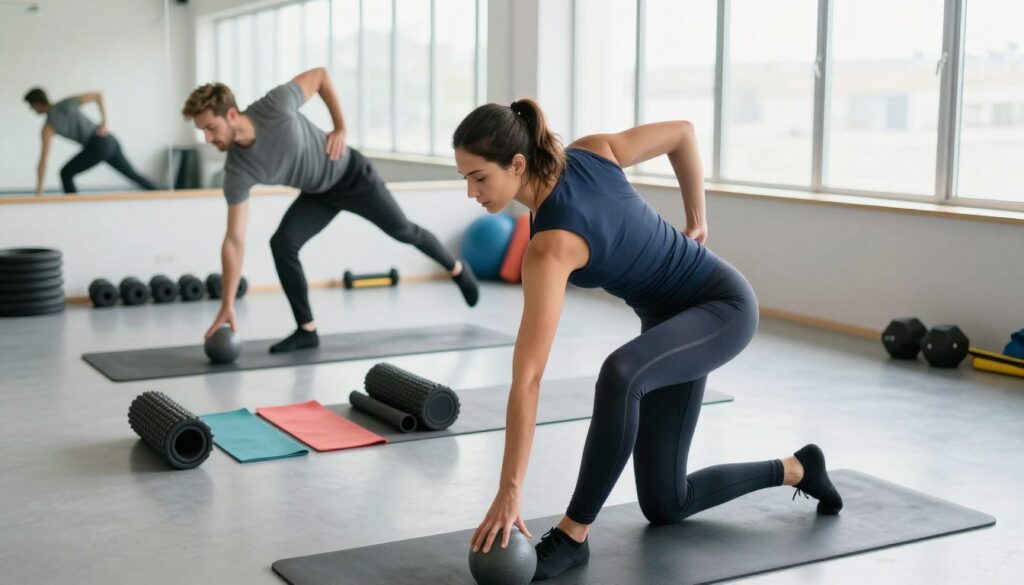
Start every session with a quick 5-minute cardio warm-up. A brisk walk, light jog, or some jumping jacks gets blood flowing. Then, you can focus on these key mobility moves.
The Hip Flexor Stretch is a superstar for injury prevention. It targets the front of your hips, which get incredibly tight from sitting. A tight hip flexor tugs on your lumbar spine, creating lower-back strain. Here’s how to do it:
- Kneel on one knee (use a pad for comfort).
- Place your other foot flat on the floor in front of you.
- Gently tuck your pelvis under and lean forward slightly.
- Hold for 30-45 seconds on each side. You should feel a stretch in the front of your kneeling hip.
Thoracic Spine Rotations are your secret weapon for a fluid upper body. This mobility drill helps your spine twist independently of your hips. It keeps your shoulders and head facing downhill while your legs work underneath. Try this seated or on all fours.
Don’t forget your hamstrings and glutes! Simple movements like cat-cows and deep squat holds work wonders. They improve the range of motion in your entire posterior chain.
Tissue care complements mobility perfectly. A foam roller is your best friend here. Spending 5-10 minutes after your workout rolling out your quads, IT bands, and upper back does two things. It breaks up muscular tightness and improves blood flow for faster recovery.
Consistency with these practices is what builds long-term resilience. Making mobility a habit is the best way to prevent injuries before they start.
| Mobility Drill | How To Perform | Primary Benefit for Skiing | Frequency Recommendation |
|---|---|---|---|
| Hip Flexor Stretch | Kneeling lunge with pelvic tilt, hold 30-45 sec/side. | Reduces lower-back strain, improves hip extension. | Daily, or before/after every ski or training session. |
| Thoracic Spine Rotation | Seated or on all fours, rotate torso to each side, hold for 2-3 breaths. | Promotes quiet upper body, improves turn initiation. | 3-4 times per week, part of warm-up. |
| Foam Rolling (Quads/IT Band) | Apply body weight on roller, slowly move from knee to hip. | Releases muscle tightness, aids recovery, enhances mobility. | 2-3 times per week, post-workout. |
| Deep Squat Hold | Hold the bottom of a bodyweight squat for 30-60 seconds. | Improves ankle, knee, and hip mobility for athletic stance. | Daily for 1-2 minutes total. |
Integrate these drills into your routine a few times a week. You’ll notice a difference in how you move on and off the snow. Your body will feel more prepared, resilient, and ready to handle variable terrain. This proactive approach is the cornerstone of smart injury prevention.
Remember, taking care of your mobility isn’t extra work—it’s essential work. It ensures all that strength and power you’ve built gets used efficiently and safely. Let’s keep your machine running smoothly!
8‑Week Schedule (Base/Build/Peak)
Let’s create a clear plan for your ski fitness journey. This schedule will get you ready for the slopes. We’ll follow a three-phase model: Base, Build, and Peak. Each phase has a specific goal to help you reach your ski fitness goals safely.
The Base Phase lasts from weeks 1-3. Here, we build your foundation. You’ll work on general strength, endurance, and fix your movement patterns. Think of it as building a strong base. Your ski conditioning includes longer cardio and basic strength exercises like front squats and RDLs.
The Build Phase is from weeks 4-6. Intensity goes up here! We add explosive movements and ski drills. Your plyometrics program gets more intense with hops and bounds. Conditioning turns to intervals, like skiing’s stop-start rhythm.
The Peak Phase is weeks 7 and 8. This is fine-tuning time. Volume goes down a bit, but intensity stays high. You want to feel strong and not tired for your trip. We reduce the workload so your body is ready to perform at its best.
Here’s a sample weekly layout to see how it all fits together. Adjust days as needed, but keep the focus order.
| Phase | Weeks | Primary Focus | Sample Weekly Structure |
|---|---|---|---|
| Base | 1-3 | General Strength & Endurance | Mon: Strength Base. Tue: Conditioning (steady-state). Thu: Movement Screen & Strength. Sat: Longer cardio session. |
| Build | 4-6 | Power & Sport-Specificity | Mon: Heavy Strength + Eccentric work. Wed: Plyometrics & Power. Fri: High-Intensity Intervals. Sun: Active Recovery/Mobility. |
| Peak | 7-8 | Peak Performance & Taper | Mon: Strength (maintenance weight). Wed: Short, sharp Plyometrics session. Fri: Light intervals or sport simulation. Reduce overall volume by 30-40%. |
Notice how the focus changes. The Base phase is your ski conditioning foundation. The Build phase adds plyometrics and power. The Peak phase focuses on consolidating gains and ensuring you’re rested.
Stick to the plan! Skipping the Base phase for intense plyometrics can lead to injury. Your body needs time to adapt to each new challenge.
This 8-week plan turns separate exercises into a cohesive plan. Your hard work in each phase will boost your confidence and resilience on the mountain. Now, let’s focus on recovery for those high-altitude days!
Cold/altitude recovery tips
Feeling drained by day three of your ski trip? It’s not just your legs. The mountain environment is a big challenge. Thin, dry air and freezing temperatures affect your body’s performance and recovery.
Studies in mountain sports show that altitude prep is key. Let’s make this science simple and actionable for you.
Hydration is your first defense. Cold, dry air takes moisture from your body. You might not feel thirsty. Dehydration leads to fatigue and headaches. Drink water often, and add electrolytes to replace lost salts.
Fuel for the furnace. Your body burns more calories to stay warm. After skiing, eat a meal with protein and complex carbs. A warm meal helps raise your body temperature, aiding recovery.
Get your blood moving. Gentle movement is important after skiing. A short walk or light stretching boosts circulation. This brings oxygen and nutrients to tired muscles and removes waste.
Contrast therapy (alternating warm and cool showers) also helps. It stimulates circulation and reduces muscle soreness. Add this to high-intensity interval training to build a resilient system.
Smart altitude prep is more than getting fit. It’s about how you recharge. Mastering hydration, nutrition, and circulation helps your body recover. You’ll be ready for another epic day, not fighting fatigue.
We can’t control the mountain weather, but we can control our response. A little knowledge makes a big difference. It turns surviving into thriving on every run.
5‑minute desk/gaming back saver
Desk work and gaming can sneak up on you. They might seem harmless, but they can quietly undermine your ski readiness. Sitting for hours can make you slouch, which is the opposite of what you need for skiing.
This habit is a form of injury prevention. It’s like a pre-hab that protects your hard work. It keeps your body ready for the slopes.
We’ve created a quick, five-minute routine for you. It’s easy to do at your desk and doesn’t need any equipment. It focuses on three main areas: fixing your posture, waking up your hips, and improving your spine’s movement.
| Movement | How to Do It | Benefit |
|---|---|---|
| Seated Cat-Cow | Sit tall. Inhale, arch your back and look up (Cow). Exhale, round your spine and tuck your chin (Cat). Repeat for 60 seconds. | Restores spinal mobility, a core component of injury prevention for the back. |
| Chair Twist | Sit tall, feet flat. Place your right hand on the back of the chair. Gently twist your torso to the right. Hold for 30 seconds, then switch sides. | Rotates the thoracic spine, combating stiffness and aiding in rotational injury prevention. |
| 90/90 Hip Switch | Sit on the floor (if possible) or edge of chair. Position legs in a “Z” shape, each bent at 90 degrees. Gently switch sides every 30 seconds. | Opens up tight hip rotators, essential for balanced skiing and knee health. |
| Standing Hip Flexor Stretch | Stand up. Step one foot back into a slight lunge. Tuck your pelvis and feel the stretch in the front of your back hip. Hold 45 seconds per side. | Counters the shortening of hip flexors from sitting, promoting better posture. |
This simple move is great for your spine. It helps keep your discs healthy and improves your body’s movement range.
Make this quick routine a part of your day. Do it once in the morning and once in the afternoon. It keeps your back and hips loose and supports your ski training.
Remember, skiing needs a dynamic body. This five-minute routine keeps you connected to your fitness goals, even on busy days.
Gear checklist & layers
Great skiing starts with the right gear. Making sure your equipment fits well is key to injury prevention. Bad boots or skis can undo all your hard work.
Here’s a simple checklist to make sure your gear supports your fitness, not hinders it.
Think of this as the final step in your pre-season prep. You want every piece working for you, not against you.
- Check Your Ski Boots: This is priority number one. A professional boot fitter can assess the liner pack-out and shell alignment. Boots that are too loose or too tight compromise control and can lead to strains or worse. Comfort here equals control on the mountain.
- Tune Your Skis: Don’t hit the slopes with dull edges or dry bases. A fresh wax and edge sharpening isn’t just about going faster—it’s about safety. Sharp edges help you grip and carve on hard snow, which is fundamental for injury prevention. A well-tuned ski is a predictable ski.
- Layer Smart: Staying dry and comfortable is the secret to staying out longer and having more fun. Forget the bulky single jacket. Use a three-part system:
Base Layer: Moisture-wicking fabric (synthetic or wool) to keep sweat off your skin.
Mid Layer: Insulation like a fleece or lightweight puffy for warmth.
Outer Shell: A waterproof and breathable jacket and pants to block wind and snow.
This system lets you add or remove layers as the weather and your exertion level change.
We’ll also touch on a modern game-changer: on-slope communication devices. These small units fit in your helmet and let you chat with your group hands-free. They’re fantastic for coordinating meet-up spots, warning about terrain, or simply sharing the stoke. For group safety, they’re a brilliant tool.
Getting your gear sorted completes the picture. When your body is strong and your equipment is dialed, you’re set up for a season of confident, safe turns. It’s the best kind of preparedness you can gift yourself.
Common mistakes & safety
Staying safe on the mountain starts before you hit the slopes. It’s all about your pre-season training. Let’s avoid common mistakes to stay strong and avoid injuries!
Every season, we see the same errors. They might seem helpful but can really slow you down or even keep you off the mountain.
Neglecting Single-Leg Work: Skiing is all about using one leg at a time. Training only with two feet misses the key strength and stability your knees and hips need.
Skipping the Warm-Up: Starting heavy workouts with cold muscles is risky. A good warm-up gets your body ready for exercise, a key part of injury prevention.
Too Much, Too Soon: Being ambitious is good, but adding too much too fast can lead to injuries. Your body needs time to adjust!
So, what should you do instead? Here’s a table showing common mistakes and safer alternatives.
| Common Mistake | The Safer, Smarter Alternative | Why It Works |
|---|---|---|
| Only doing double-leg lifts (e.g., back squats) | Prioritize split squats, lunges, and step-ups | Builds the unilateral stability and control you need for skiing’s demands, directly supporting injury prevention. |
| Launching into a hard session cold | Commit to a 10-minute dynamic warm-up (leg swings, hip circles, light cardio) | Increases blood flow, improves mobility, and primes your nervous system, reducing the risk of pulls or tears. |
| Adding weight, reps, and plyos all in the same week | Follow a phased plan, like the comprehensive pre-season fitness tips outlined here, that progresses logically. | Allows your tendons, ligaments, and muscles to adapt gradually, building resilience without overload. |
| Lifting heavy with poor form | Always prioritize perfect technique over the number on the weight plate. | Proper form ensures the right muscles are working and protects your joints. It’s non-negotiable for safety. |
Stay safe by listening to your body. Know the difference between normal soreness and sharp pain. If it’s sharp, stop and rest.
Make proper form your top priority. A light weight moved correctly is better than a heavy weight with bad form.
If you have health concerns, always check with your doctor before starting a new workout. Getting cleared is key to your injury prevention plan.
By avoiding these mistakes and following safety rules, you’re not just getting fit. You’re making your body strong and ready for the mountain. Let’s get you to the slopes healthy and strong!
Conclusion
Your hard work has made your body ready for the mountain. You’ve built strong muscles, gained explosive power, and improved your balance. This ski conditioning turns regular fitness into something special for skiing.
You’re not just stronger; you’re also more durable and confident on the slopes. Thanks to altitude prep and recovery, you adapt fast to the resort. Your muscles won’t get as tired, so you can ski more.
Now, it’s time to see how it works on snow. Your legs will move smoothly, and you’ll feel stable on tricky terrain. All your hard work will shine in every turn you make.
We’re sure you’ll ski longer, safer, and with more fun all season. Your body is ready to perform. The mountain is waiting for you. Go enjoy those turns.