
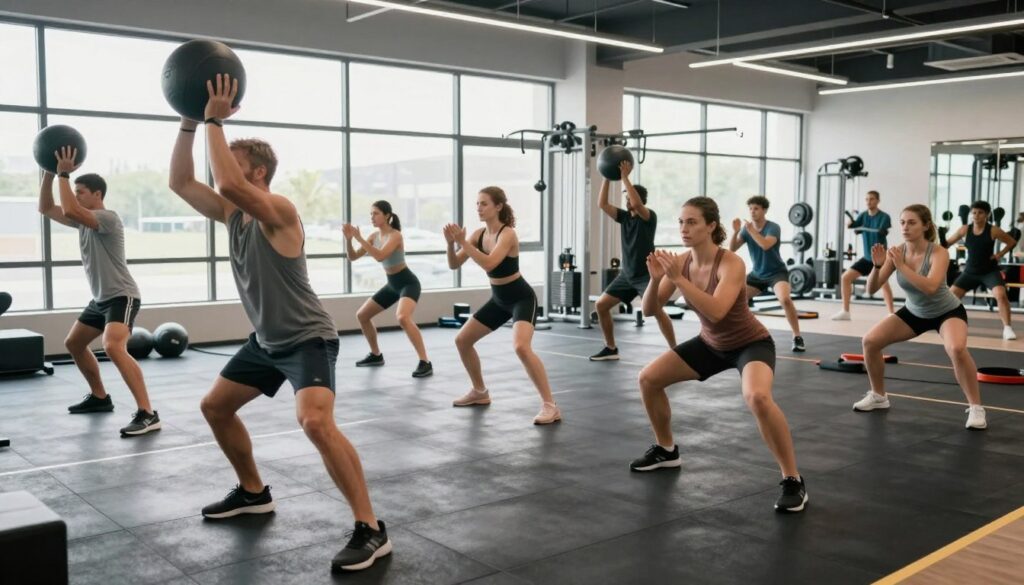
Welcome! Let’s explore where your biggest performance gains happen. It might surprise you, but some of your biggest breakthroughs happen far from the water. This is the world of strength and conditioning done on land.
Forget the old idea of simply “swimming on land.” True dryland work isn’t about mimicking your stroke in the air. It’s about building the complete physical engine that powers every lap. We focus on foundational posture, joint mobility, and total-body stability.
Why does this matter so much? A stronger, more coordinated body directly translates to a longer, more powerful pull through the water. It creates a better connection with your kick. Crucially, it builds resilience against the common overuse injuries that can slow any athlete down.
Think of it as non-negotiable maintenance for your sport. Whether you’re between pool sessions or aiming for a new personal record, this targeted work is how you keep progressing. It makes advanced concepts like force production and body awareness accessible and actionable for everyone.
Why dryland matters by stroke demands
Dryland training is not just an extra activity. It’s tailored to meet the specific needs of your main stroke. Unlike a generic gym routine, it’s designed to complement your swimming. Each stroke has its own unique demands, and your dryland should match those needs perfectly.
Think of it as building the exact strength and mobility your stroke needs. This targeted approach makes dryland workouts incredibly effective. They help strengthen your weak points and boost your strengths, even when you’re not in the pool.
The goal is to solve the challenges of swimming on land. Do you need a strong core, solid shoulders, or explosive hips? We can work on all of these. Let’s explore what each stroke family needs from your dryland workouts.
- Freestyle & Backstroke: These strokes require a long, streamlined body. Focus on scapular control and core stability. Your dryland should strengthen your back, glutes, and hamstrings to maintain a healthy body line and endurance.
- Butterfly: This stroke needs explosive, coordinated movement. Dryland for flyers focuses on shoulder stability and hip drive. Exercises that improve core and hip coordination are essential.
- Breaststroke: This stroke requires hip and knee mobility for a powerful kick. Your dryland should enhance hip and groin mobility while strengthening your glutes and inner thighs. Stable shoulders are also vital for the pull.
But there’s more! Event distance also plays a role. A 50m freestyle sprinter needs explosive power for a quick start and finish. Their training might resemble a football player’s, with jumps and throws.
A 1500m distance swimmer, on the other hand, needs endurance and a strong core. Their dryland workouts will focus on holding positions for longer periods and repeating strength exercises under fatigue.
So, what’s your stroke? Are you a butterflier needing explosive power or a backstroker focusing on body line? Match your land work to your water work. This way, every rep and set will boost your speed, resilience, and confidence.
Shoulder health: scapula + cuff stability circuit
Your shoulder joint is like the precision hub of your swimming machine. It needs both mobility and solid support. This range of motion makes it the swimmer’s most vulnerable spot. Repetitive overhead strokes can stress the joint, leading to “swimmer’s shoulder.”
But here’s the good news: we can build a defense system. The secret isn’t in lifting heavier weights. It’s in strengthening the smaller muscles that control and stabilize the joint.
The rotator cuff and scapular stabilizers are key players. Your shoulder blade, or scapula, is the stable base for all arm movement. True scapular stability is essential for every powerful pull.
Our goal is to fortify these areas with a simple circuit. We use light resistance bands or bodyweight, focusing on high repetitions and control. This isn’t about fatigue; it’s about teaching your shoulder to move smoothly and securely.
Here is your go-to stability circuit. Perform 2-3 rounds, 12-15 reps per exercise, with minimal rest between moves:
- Band External Rotations: This directly targets the rotator cuff, acting like a natural brace for the joint.
- Scapular Retractions (Face Pulls): These strengthen the muscles that pull your shoulder blades back and down, correcting posture and creating a stable platform.
- Scapular Push-Ups: From a plank position, you simply sink and lift your body by pinching your shoulder blades together. It’s a pure scapular stability drill.
- Band Pull-Aparts: A fantastic move to awaken the muscles between your shoulder blades and combat the rounded posture from swimming and daily life.
Commit to this circuit 2-3 times per week. You’ll feel a difference in the water—smoother strokes, less nagging ache, and the confidence that your propulsive engine is protected. Strong, resilient shoulders are built on this kind of focused, intelligent work.
Core for Streamline/Rotation (Anti‑Rotation, Hollow)
A fast swim isn’t just about strong arms or legs. It’s about a core that resists movement, not creates it. Forget about getting a six-pack for looks. In the water, your midsection’s job is stabilization.
A weak core is like a loose car transmission. All your power leaks out instead of moving you forward. This leads to sinking hips and legs, breaking your streamline. It also causes inefficient rotation, where you spin from your lower back.
Core anti-rotation training is game-changing. It teaches your core to resist twisting forces. Think of it as locking your hips to your shoulders, moving as one unit.
The hollow body position is also key. It trains your front body to stay flat and fast. Together, anti-rotation and hollow holds create a stable platform for powerful strokes.
Let’s look at the two main core exercises you need:
- Anti-Rotation Exercises: These challenge your core to prevent twisting. The Pallof press is a classic example. You push a resistance band away while fighting the pull to rotate.
- Hollow Body Holds: This is the foundation for streamline. Lie on your back, press your lower back into the floor, and lift your shoulders and legs slightly. It teaches full-body tension.
Both exercises seem simple but are very challenging. They teach your body the control needed for a sleek, fast swim. You’re training for stiffness where it counts.
Here’s a quick guide to the most effective core exercises for swimmers:
| Exercise | Primary Focus | Key Coaching Cue | Beginner Progression |
|---|---|---|---|
| Pallof Press | Anti-rotation, resisting twist | “Brace your core like someone is about to punch your stomach.” | Start with a light resistance band, 3 sets of 8-10 reps per side. |
| Hollow Body Hold | Full-body tension, streamline position | “Press your lower back flat into the floor.” | Start with knees bent, progress to straight legs, aim for 3 sets of 20-30 second holds. |
| Dead Bug | Anti-extension, core coordination | “Move your arm and opposite leg slowly, keep your back flat.” | 3 sets of 10 controlled reps per side. |
| Side Plank | Lateral stability, hip position | “Stack your hips, don’t let them sag or hike up.” | Hold for 20-30 seconds per side, 3 sets. |
| Farmer’s Carry | Full-body bracing, posture | “Walk tall, keep your shoulders level and core tight.” | Carry a moderate weight for 30-40 yards, 3 sets. |
Notice none of these exercises involve crunching forward. That’s because swimming rarely needs you to flex your spine like a crunch does. Your core’s main job is to prevent unwanted movement.
Mastering core anti-rotation and hollow body control will make a big difference. Your streamline will feel solid. Your freestyle and backstroke will become powerful and controlled, coming from your shoulders and chest.
Start doing these exercises 2-3 times a week. Focus on the quality of your movements, not heavy weights or long times. Remember, you’re teaching your body to create and maintain full-body tension. This skill will make you swim faster and more efficiently.
Posterior chain focus: hinge, pull, row, pull‑ups
Your swimming power doesn’t just come from your arms. It’s also from muscles from your heels to your neck. This network is your posterior chain. It’s your body’s true powerhouse for moving in the water.
Think of it as your swimming engine room. It includes your glutes, hamstrings, lower back, lats, and spine muscles. On land, we often sit and let these muscles get lazy. In the pool, they become the driving force for explosive starts, powerful turns, and that final, finishing pull to the wall.
Strengthening this system does two incredible things for your swimming. First, it gives you more raw power. Second, it actively fights the rounded-shoulder “swimmer’s slouch” by pulling your shoulders back and opening up your chest. Better posture means better breathing and a cleaner streamline!
We’ll build your posterior chain through three fundamental movement patterns:
- The Hip Hinge: This is the motion for explosive starts and push-offs. The king of hinge exercises is the deadlift. It teaches you to generate force from your hips and glutes, just like you do launching off the blocks.
- The Pull: This pattern builds your lats—the major muscles that pull your arm down through the water. Exercises like lat pulldowns and, of course, pull-ups are perfect here.
- The Row: Rows target your upper back and rear shoulders. A strong row means a more stable pull and a healthier shoulder joint. Bent-over rows are a classic choice.
Don’t worry if you can’t do a pull-up yet! Everyone starts somewhere. Here are scaled versions to build your strength progressively:
- For Hinges: Start with kettlebell or dumbbell deadlifts using light weight. Focus on pushing your hips back, not just bending your back.
- For Pulls: Use a resistance band for assisted pull-ups, or try negative pull-ups (jump up and lower down slowly). Lat pulldown machines are also excellent.
- For Rows: Begin with bent-over dumbbell rows or seated cable rows. Concentrate on squeezing your shoulder blades together at the top of the movement.
Remember, the goal isn’t to get bulky. It’s to build a resilient, powerful posterior chain that makes every stroke more efficient. When this engine is strong, you’ll feel a noticeable difference in your stability off the wall and your speed through the water. Let’s fire it up!
Power: med‑ball throws, jumps, KB swings
Power training isn’t about getting big. It’s about making your muscles fast and strong. It’s like building your body’s spring.
In the pool, this spring is key for quick starts, fast turns, and strong breaks.
Dryland is where you build this spring. We focus on exercises that make your muscles fire quickly. The goal is to move with explosive power, not slow down.
Let’s look at the three main tools for swim power. Each one targets a different part of your explosive power in the water.
Medicine Ball Throws boost your upper body and core power. Slamming a ball down helps you generate force from your core to your arms. Rotational throws are great for freestyle and backstroke, teaching you to throw with purpose.
Jumps are key for leg power. Box and broad jumps train your legs to push off hard. This helps with your start and push-off from the wall. Remember to land softly and be ready to go again.
Kettlebell Swings are a fantastic full-body exercise. They teach you to snap your hips like in a dolphin kick or start. They also improve your grip and conditioning. The swing focuses on hip power, not arm power.
Here’s a quick guide to see how these exercises connect to your swimming:
| Exercise Category | Primary Focus | Swimming Link | Key Cue |
|---|---|---|---|
| Medicine Ball Throws | Rotational & Core Power | Power for stroke catch & finish | “Throw through the ball” |
| Jumps (Box, Broad) | Leg Drive & Elasticity | Explosive starts and turns | “Push the ground away” |
| Kettlebell Swings | Hip Extension & Full-Body Power | Dolphin kick and breakout power | “Snap the hips forward” |
Remember, focus on quality over quantity. You’re training your nervous system to use muscles fast. Do 3-5 powerful reps, rest well, and repeat. If you feel slow, it’s time to stop.
Adding just one or two power sessions a week can boost your speed. Your body will learn to generate force quicker. This speed will make you a more powerful swimmer from block to wall.
Mobility: lats, T‑spine, hips opener flow
Mobility is key to using dryland strength in the pool. Imagine having strong shoulders and core but tight lats. This section helps you unlock that usable range of motion.
Swimmers often get tight in specific areas. Pulling can shorten the lats, affecting reach. A stiff thoracic spine limits rotation and breathing. Tight hips can flatten your kick and ruin your streamline.
Mobility work is not just static stretching. Mobility work is active. You move your joints through their full range. It’s like making space in a crowded room.
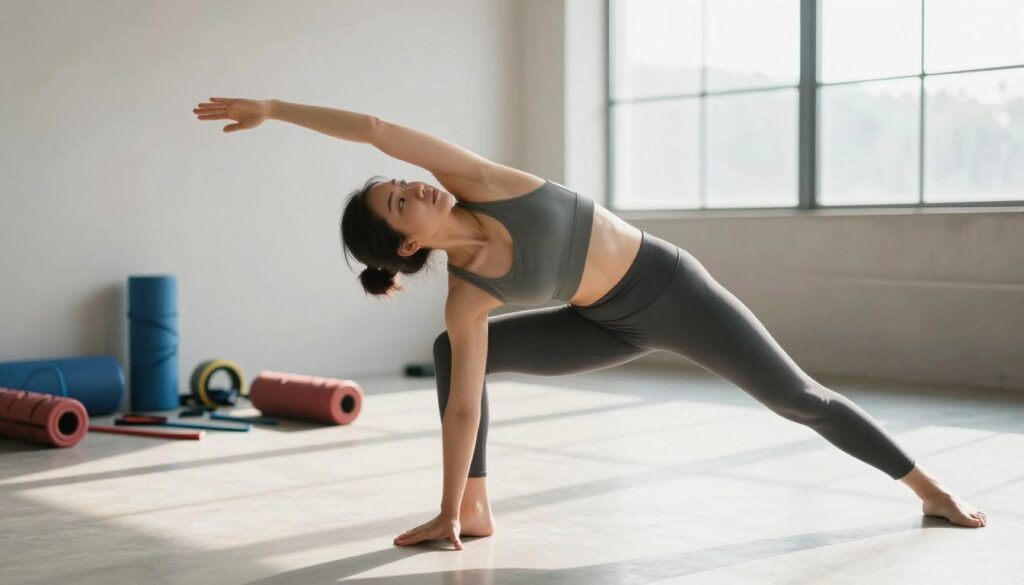
Our “opener flow” targets these three critical zones in a smooth sequence. You’ll move from one exercise to the next, focusing on breath and movement quality. Let’s look at why each area matters and what we’re aiming for.
| Area | Why It Gets Tight | Mobility Goal | Top Exercise |
|---|---|---|---|
| Lats | Repetitive pulling motions, poor posture out of the water. | Improve overhead reach and shoulder stability. | Foam Roller Lat Stretch |
| Thoracic Spine | Lack of rotational movement in daily life; swimming in a mostly straight line. | Increase rotation for tighter turns and better breathing. | Open-Book Rotation |
| Hips | Sitting, kicking from the knee instead of the hip. | Free up the hip joint for a more powerful, fluid kick. | Pigeon Pose or Hip Flexor Lunge |
Ready to try it? This flow can be done pre-workout to prepare or post-workout to aid recovery. Move slowly and breathe deeply into each position.
- Start with Cat-Cows: Warm up the entire spine with 5-10 rounds of arching and rounding your back.
- Open the Lats: Lie sideways on a foam roller, arm extended overhead. Let your body sink for 30 seconds per side.
- Rotate the T-Spine: Perform the “Open-Book” exercise. Lying on your side, knees bent, open your top arm across your body, following it with your eyes.
- Release the Hips: Move into a Pigeon Pose or a deep hip flexor lunge. Hold for 30-45 seconds per side.
- Finish with a Flow: Gently link these movements together for 2-3 rounds, focusing on smooth transitions.
Doing this routine a few times a week can make a big difference. For a more detailed post-swim routine, check out these essential stretches for swimmers.
Remember, mobility is your secret weapon for a fluid, powerful, and injury-resistant stroke. By dedicating just 10 minutes to this opener flow, you’re not just stretching—you’re upgrading your body’s software to match the new hardware you’re building on dryland.
Sample 2‑day and 4‑day programs (sprint vs distance)
Let’s dive into practical 2-day and 4-day programs for your swimming goals. These plans are your guide to building swimmer strength step by step. A good plan mixes challenge with rest, making every dryland session more powerful in the water.
Think of these templates as starting points. You can adjust exercises based on the equipment you have from our home setup guide. The key is consistency and listening to your body.
The 2-Day Foundation Program is great for beginners or during busy swim weeks. You only need to commit two days, with at least one rest day in between. Each session works your whole body, focusing on shoulders, core, and the back.
This simple approach builds a strong base of stability and endurance. It keeps you from getting overwhelmed while delivering results. It’s a sustainable way to start your dryland journey.
The 4-Day Specialization Program is for athletes ready to commit more time and see faster gains. With four sessions a week, you can focus on different areas. You can split your days into upper body and lower body, or focus on strength and power separately.
This structure lets you work harder on specific muscle groups. It leads to quicker improvements in power and muscle. It’s the next step after mastering the 2-day routine.
Crucially, your event specialty changes the focus. A sprinter’s program focuses on explosive power and high-intensity efforts. A distance swimmer’s plan emphasizes muscular endurance and sustained core stability.
The table below shows how to adapt the weekly structure for each goal. Remember, these are samples—feel free to swap in specific exercises from earlier sections.
| Program Type | Best For | Weekly Focus | Sprinter Adjustment | Distance Adjustment |
|---|---|---|---|---|
| 2-Day Full Body | Beginners, Busy Schedules, Heavy Swim Weeks | Total body stability & foundational strength. Session A: Scapula circuit, hinge, anti-rotation. Session B: Rows, jumps, hip mobility. | Add med-ball throws or kettlebell swings to one session. Keep reps lower, intensity high. | Extend plank/hold times. Add extra sets with moderate weight for endurance. |
| 4-Day Split (Upper/Lower) | Intermediate/Advanced, Off-Season, Focused Strength Phase | Day 1: Upper Pull (rows, pull-ups). Day 2: Lower Hinge (deadlifts, jumps). Day 3: Upper Push/Press + Core. Day 4: Lower Squat + Stability. | Power focus on Day 2 & 4 (e.g., box jumps, weighted jumps). Upper days include explosive med-ball slams. | Add circuit-style conditioning on one day (e.g., banded rows into planks). Prioritize T-spine and lat mobility on upper days. |
How do you choose? If you’re new to dryland or your pool schedule is packed, start with the 2-day plan. It builds essential swimmer strength without risk of burnout. After 4-6 weeks, you can consider adding a third day.
If you’re in a dedicated training block with more time, the 4-day split offers remarkable gains. It lets you work on weak points more directly. Just ensure you have at least one full rest day per week.
Progress is about gradual increase. Add a little more weight, an extra rep, or hold a position a few seconds longer each week. This steady climb, paired with your pool work, is the ultimate formula for a stronger stroke.
Breath work & recovery
Learning to breathe well on land helps you stay calm and efficient in the pool. Most of us breathe without thinking, but swimmers need to master this skill. Bad breathing can make your neck and shoulders tense, ruining your stroke.
Dryland training is great for practicing breathing. You can focus on your breath without the stress of needing air. This makes your swim smoother and more controlled.
Here are two simple drills to do at home. They help you breathe better and more efficiently.
Crocodile Breathing (Diaphragmatic): Lie on your stomach with your forehead on your hands. Breathe in slowly through your nose, pushing your belly into the floor. Your lower back should expand. This uses your diaphragm, key for breathing and core stability in the water.
Side-Lying Breathing (Rib Cage Expansion): Lie on your side with knees bent. Place your top hand on your bottom rib cage. Inhale deeply, expanding your ribs sideways into your hand. This lets you breathe better without lifting your shoulders.
Now, let’s talk about recovery. Recovery isn’t just resting. It’s the active process where your body gets stronger from training. Skipping it means missing out on performance gains.
Think of breath work and recovery as updating your body’s “software”. All the strength and mobility you build is useless if your body is tense.
Here’s your practical recovery toolkit:
- Self-Massage: Spend 5-10 minutes with a foam roller or lacrosse ball on your lats, chest, and glutes. This releases muscle tightness and improves blood flow.
- Hydration: Water is key for muscle repair. Drink water all day, not just during practice.
- Nutrition Timing: Eat a snack or meal with protein and carbs within 45 minutes after training. This fuels recovery.
- Quality Sleep: This is essential. Your body repairs and adapts most during deep sleep. Aim for 7-9 hours in a dark, cool room.
By spending a few minutes each day on breath work and recovery, you build resilience. You’ll swim with less tension, recover faster, and unlock your dryland training’s full power.
Minimal equipment home setup
Let’s clear up a big myth: you don’t need expensive machines to do effective dryland training. You can create a great swim training spot in your bedroom, garage, or dorm room. With a few smart tools, you can work on strength, power, mobility, and recovery. No gym? No problem!
First off, resistance bands are key for any simple setup. They’re versatile, affordable, and great for swimming’s rotational and pulling needs. A set of looped bands is your go-to for shoulder health and pulling strength.
Here’s your essential kit, in order of importance:
- Resistance Bands: Your anchor for shoulder health. Use them for band pull-aparts, face pulls, and assisted pull-up work. They also add challenge to squats and presses.
- Suspension Trainer (e.g., TRX): This is your bodyweight powerhouse. It’s perfect for rows (mimicking the pull phase), core anti-rotation holds, and single-leg exercises for stability.
- Medium-Weight Kettlebell or Dumbbell: One bell is enough. Use it for kettlebell swings (explosive hip power), goblet squats, and overhead presses. It builds the posterior chain and core stability you need for a powerful kick and pull.
- Yoga Mat: For comfort during core work, stretching, and mobility flows. It defines your workout space.
- Foam Roller: Your built-in recovery tool. Use it for myofascial release on lats, shoulders, and legs to improve mobility and reduce soreness.
This minimalist collection covers every base. The bands and suspension trainer handle your upper body and core stability. The kettlebell builds raw power and leg drive. The mat and roller keep you mobile and ready for the next session.
If your budget is super tight, start with resistance bands and a yoga mat. You can do an enormous amount of work with just those two items. Next, add the kettlebell, then the suspension trainer. For more ideas on setting up a home gym as a swimmer, check out our dedicated gear guide.
Remember, the goal isn’t to replicate a commercial gym. It’s to have the specific tools that address a swimmer’s unique needs. This small, intentional setup is surprisingly effective for making you stronger, more resilient, and faster in the water.
Screen/gaming posture quick fixes
Your biggest opponent in the pool might not be the clock, but the chair you sit in all day. Modern life encourages a sneaky posture—rounded shoulders and a forward head—that is the direct enemy of a powerful, streamlined swimmer.
Hours at a desk or on a phone actively train your body into this weak position. This daily grind pulls you out of alignment, undermining all the strength you build during dryland training. The good news? You don’t need a full workout to fight back.
What you need are smart, posture quick fixes you can sprinkle throughout your day. Think of them as hitting the reset button on your body. These micro-actions counteract the negative effects of your screen time, ensuring your dryland work isn’t just fixing problems your desk just recreated.
Here is your essential playbook of four key habits:
- Set Posture Reminders: Use your phone or computer to set alerts every 30-60 minutes. When the alarm goes off, it’s your cue to check your position. Sit tall, pull your shoulders back, and align your ears over your shoulders.
- Doorway Chest Stretch: This is a champion move for opening tight chest muscles. Place your forearms on either side of a door frame. Step one foot forward until you feel a gentle stretch across your chest and shoulders. Hold for 30 seconds.
- Chin Tucks: This simple fix fights forward head posture. Sitting or standing tall, gently retract your head straight back, as if you’re making a double chin. Hold for 3-5 seconds, then release. Do 10 reps.
- Scapular Squeezes (Micro-Breaks): Perfect during a game load screen or between tasks. Sit upright and squeeze your shoulder blades together and down, as if trying to pinch a pencil between them. Hold for 5 seconds. Do 10-15 reps.
| The Problem (Screen Posture) | The Swim Need | The Quick Fix |
|---|---|---|
| Rounded, forward shoulders | Strong, retracted scapulae for pulling power | Scapular squeezes every hour |
| Forward head position | Neutral spine alignment for streamline | Chin tucks throughout the day |
| Tight chest muscles | Open shoulders for better rotation | 30-second doorway stretch |
| Static, seated position | Dynamic, engaged core and back | Posture reminder alerts for micro-breaks |
Consistency beats duration every time. Integrating these posture resets into your daily routine is more effective than one long stretch session. They keep your body aware and aligned, turning the fight against desk posture into a series of small, winning battles. Your swimming posture will thank you.
Testing (Pull‑Ups, Plank, Broad Jump)
Imagine having clear proof that your dryland training is working. These three simple tests give you just that. They measure the strength and power that directly fuel your swimming. You don’t need fancy equipment, just a pull-up bar, a timer, and some floor space.
Why test? What gets measured gets improved. Testing every 4 to 6 weeks turns abstract effort into concrete feedback. It shows you where you’re strong and where to focus next. Most importantly, it’s a chance to celebrate your progress and stay motivated.
We’ll focus on three sport-relevant benchmarks: max strict pull-ups for upper body pulling strength, a front plank hold for core stability, and a standing broad jump for lower body explosive power. Let’s break them down.
The Strict Pull-Up Test
This test targets your lats, biceps, and back—the engine room for your pull phase. A strong pull-up translates to a more powerful stroke. To perform it, hang from a bar with an overhand grip, hands slightly wider than shoulders. Pull yourself up until your chin clears the bar, then lower with control. No kipping or swinging! Count your max number of full repetitions.
The Front Plank Hold Test
Swimming demands a rigid, streamlined body. The plank tests your core’s ability to stay stiff and resist rotation. Get into a push-up position, but rest on your forearms. Your body should form a straight line from head to heels. Hold this position as long as you can. Time stops when your hips sag or rise.
The Standing Broad Jump Test
Explosive leg power drives your start and turns. The broad jump measures that spring. Stand with feet shoulder-width apart behind a line. Swing your arms and jump forward as far as you can, landing on both feet. Measure the distance from the start line to your heels. Give yourself three attempts and record your best.
So, what do your scores mean? Use the table below as a general guide. Remember, these are benchmarks, not limits. Your goal is to beat your own personal best!
| Test | Beginner | Intermediate | Advanced |
|---|---|---|---|
| Max Strict Pull-Ups | 1-3 reps | 4-8 reps | 9+ reps |
| Front Plank Hold | 60-90 seconds | 91-150 seconds | 151+ seconds |
| Standing Broad Jump | Your height or less | 1.1x to 1.3x your height | 1.4x your height or more |
Schedule your testing every 4 to 6 weeks. Pick a day when you’re rested. Write your scores down in a training log. Seeing those numbers climb is incredibly rewarding!
Use the results wisely. If your pull-up count is low, maybe add more pulling exercises next cycle. If your plank time is your strongest score, your core work is paying off. These tests aren’t exams to stress over. They’re your personal report card, showing how your dryland dedication is building a stronger, faster swimmer.
Ready, set, test! You’ve got this.
Common errors to avoid
Many swimmers unknowingly sabotage their dryland progress with these frequent errors. Your enthusiasm is great, but it can lead to missteps. We’re here to guide you past these common pitfalls so your training is always effective, efficient, and safe.
Think of dryland not as general gym time, but as targeted swim-specific preparation. The most common mistakes happen when swimmers treat it like a bodybuilding session or skip the foundational stuff. Let’s break them down.
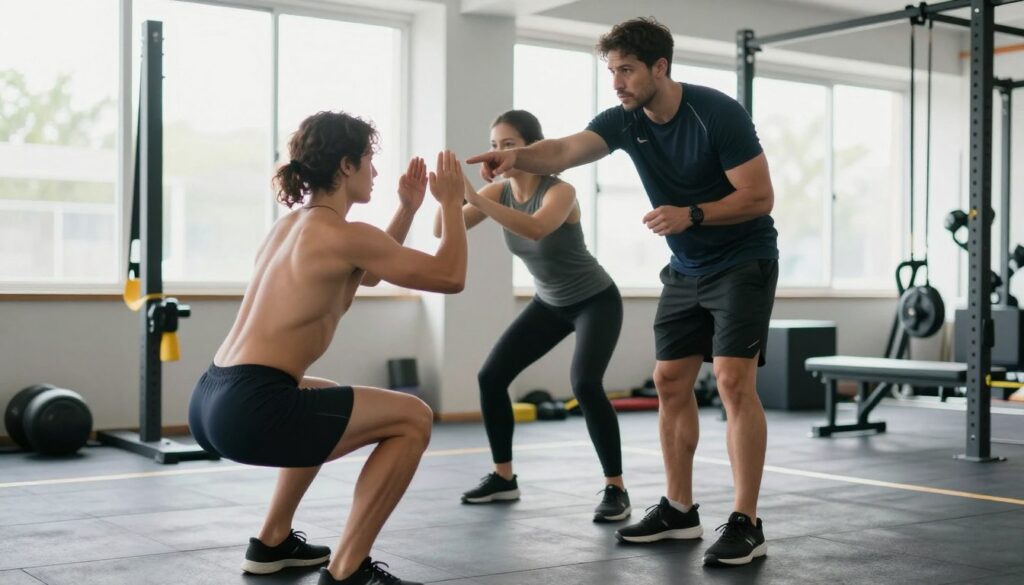
Error #1: Training Like a Bodybuilder. It’s tempting to focus on the “mirror muscles” like the chest and biceps. But swimming power comes from your back, shoulders, and legs. Overdoing bench presses and curls can create muscle imbalances, pulling your shoulders forward and hurting your streamline. The fix? Prioritize pulling motions like rows and pull-ups to build that back strength.
Error #2: Ignoring Mobility Work. You wouldn’t jump in the pool without warming up, right? The same goes for dryland. Skipping mobility drills for your lats, thoracic spine, and hips limits your range of motion in the water. This makes your stroke less efficient and can strain your shoulders. Spend 5-10 minutes on a dynamic mobility flow before every session.
Error #3: Lifting Too Heavy, Too Soon. Using weight that forces you into poor form is a major red flag. Sloppy form during a deadlift or squat doesn’t build power—it builds bad habits and risk. Proper technique always beats more weight. Start light, master the movement, and only then add load. Your future self will thank you.
Error #4: Neglecting the Posterior Chain & Core. Your glutes, hamstrings, and lower back (the posterior chain) are your engine for a powerful kick and strong push-off. A weak core compromises your rotation and streamline. Don’t just do crunches! Focus on exercises like glute bridges, Romanian deadlifts, and anti-rotation planks.
Error #5: Having No Progression Plan. Doing the same exercises with the same intensity week after week leads to a plateau. Your body adapts! You need a plan to gradually increase the challenge. This could mean adding a rep, slowing the tempo, or using a slightly heavier med ball.
| Common Error | Why It’s a Problem | The Simple Fix |
|---|---|---|
| Over-emphasizing Chest/Biceps | Creates shoulder imbalance, hurts posture and streamline. | Balance push exercises with 2x the volume of pull exercises (rows, pull-ups). |
| Skipping Mobility Work | Restricts stroke range of motion, increases injury risk. | Add a 10-minute mobility flow for lats, T-spine, and hips before every workout. |
| Lifting with Poor Form | Teaches bad movement patterns, leads to strain or injury. | Film your sets or work with a coach. Never sacrifice form for more weight. |
| Neglecting Posterior Chain | Robs your kick and underwater power. | Include hinge exercises (deadlifts, swings) and rows 2-3 times per week. |
| No Progression Plan | Results in training plateaus and stalled progress. | Follow a structured program that increases difficulty every 2-4 weeks. |
By steering clear of these common errors, you make every minute of your dryland training count. It’s about working smarter, not just harder. Remember, the goal is to build a resilient, powerful body that performs in the water. You’ve got this!
10‑week progression
Think of your dryland training as a 10-week journey. Each phase builds on the last to unlock new power in the water. Progress doesn’t happen by accident; it happens by plan. This roadmap is your key to building durable, performance-boosting swimmer strength that translates directly to faster times and more resilient shoulders.
We break the 10 weeks into three distinct phases. Think of it like constructing a building. You wouldn’t start with the fancy details, right? You need a solid base first.
The first phase is your Foundation. This lasts 2-3 weeks. Here, the only goal is movement quality and stability. You’ll master the basic patterns—hinges, pushes, pulls, and cores bracing—with light weight or just your body. It’s not glamorous, but it’s essential. This phase wires your nervous system for safety and efficiency, preventing injuries down the line.
Next comes the Strength-Building Phase, spanning about 4-5 weeks. Now you carefully add load and intensity. This is where the principle of “progressive overload” comes in. It simply means challenging your body a little more over time—adding a few pounds, an extra rep, or reducing rest. Your muscles adapt by getting stronger. This is the core of your swimmer strength development.
The final 2-3 weeks are the Power/Peak Phase. Here, you translate that new raw strength into sport-specific explosiveness. You’ll incorporate medicine ball throws, jumps, and faster kettlebell swings. The focus shifts to moving weight with speed, mimicking the quick, powerful movements you need off the blocks and walls. It’s the payoff for your earlier work!
A critical part of any good plan is recovery. We schedule easier “deload” weeks, typically every fourth week. During a deload, you cut the volume or weight in half. This gives your tendons, joints, and nervous system a chance to fully recover and adapt. It keeps you fresh and prevents burnout, ensuring you get stronger instead of just tired.
Sticking to this progression does more than boost a single metric. It builds athleticism that supports all your training, including your sports drills for cardio. You’re not just working out; you’re investing in a body built for swimming. By the end of 10 weeks, you’ll have a new baseline of swimmer strength to maintain or build upon for your next season.
Ready to start? Grab your calendar, mark your weeks, and commit to the process. Your future, faster self will thank you!
FAQs
Let’s tackle the most common questions swimmers have when starting or refining their dryland workouts. This is your go-to guide for practical, no-nonsense answers.
You might be wondering about a few key things. Here are the questions we hear most often:
- How often should I do dryland?
- Will I get too bulky?
- Can I train on the same day as swimming?
- What if I’m really sore?
- Do I need a full gym setup?
- When will I see results in the water?
We’ll break each one down with clear, experience-based advice to help you train smarter.
How often should I do dryland workouts?
How often you do dryland depends on your swim schedule and goals. For most swimmers, two to four sessions per week is best. This lets your body adapt without overtraining.
Dryland is like the support crew for swimming. You want enough practice to get strong, but not so tired for the pool.
| Your Primary Swim Focus | Recommended Dryland Frequency | Key Goal |
|---|---|---|
| Sprint & Power | 3-4 sessions/week | Maximize explosive strength |
| Distance & Endurance | 2-3 sessions/week | Build muscular stamina |
| General Fitness & Technique | 2 sessions/week | Improve stability and prevent injury |
Will dryland make me too bulky and slow?
This is a common fear, but the answer is almost always no. The training we recommend builds functional strength, not big bodybuilder muscles.
You’re working on power, stability, and injury prevention. This makes your stroke more efficient and faster, not slower. It’s about the quality of muscle, not just size.
Should I do dryland on the same day as swimming?
Yes, you can! The key is timing and intensity. Try to do your dryland workouts after swimming if you can. This keeps you fresh for your water technique.
If you must train before swimming, keep it light or focus on mobility. Never do a heavy workout right before swimming.
What if I’m sore from a previous workout?
Some soreness is normal, but listen to your body! Mild stiffness can be helped by a light swim or mobility session.
If you’re very sore, it’s okay to rest or stretch gently. Pushing through severe pain can lead to injury. Consistency over weeks is more important than one tough session.
Do I need weights or a lot of equipment?
Not at all. You can make great progress with minimal gear. Your body weight, resistance bands, and a sturdy surface are great starting points.
As you get better, a few dumbbells, a kettlebell, or a pull-up bar can add useful options. Remember, the program is adaptable. Don’t let a lack of fancy equipment stop you from starting.
How soon will I see results in the pool?
This depends on your starting point and consistency. Many swimmers notice improvements in feel for the water and core stability within 4-6 weeks.
Measurable gains in power, like faster starts or more powerful kicks, often show up after 8-10 weeks of consistent training. Be patient and trust the process—your strength is building even when you can’t see it yet!
We hope these answers clear the path for your training. The most important step is to begin. Your future, faster self in the pool will thank you for committing to your dryland workouts today.
Conclusion
Your journey through this guide shows a key truth. Dryland training isn’t separate from swimming. It’s about building the athlete who performs in the water.
The strength, power, mobility, and stability you gain on land are your body’s engine. This engine lets your swimming skills shine. Water is the medium, but dryland is the force.
Working hard outside the pool is an investment. It leads to faster times, more durability, and a longer career in your sport. Every exercise you do adds to your athletic strength.
The pool is where you show your skills. But your true championship chance is built on dry land. Keep working on it.